
I had to make some more of those
cute bags...so I thought, "Why not make a tutorial?". So here goes:
You will need:
3 fat quarters
Batting the same size as your fabric
Coordinating button
8 inches of coordinating Velcro
Choose which fabric you want for the outside of your bag, which you want for the inside and which you would like to use for the binding.
Sandwich your top fabric, batting and bottom fabric together and machine quilt. Then trim it to 18" square and bind. (If you need help binding click
here.)
Take your quilted and bound piece and fold it in a triangle. I am going to refer to the fabric for the outside as the "right side". Make sure the right sides are together.
Measure over 8.5 inches from the corner of the binding and mark that on the fold. Repeat on other side.
On each side measure up from that mark 6 inches and mark. Draw a line from the top mark to the bottom mark.
You also need to take this top mark and mark it on the insides too. I put a pin through at that top mark, open the top and mark where I can see my pin on all sides.
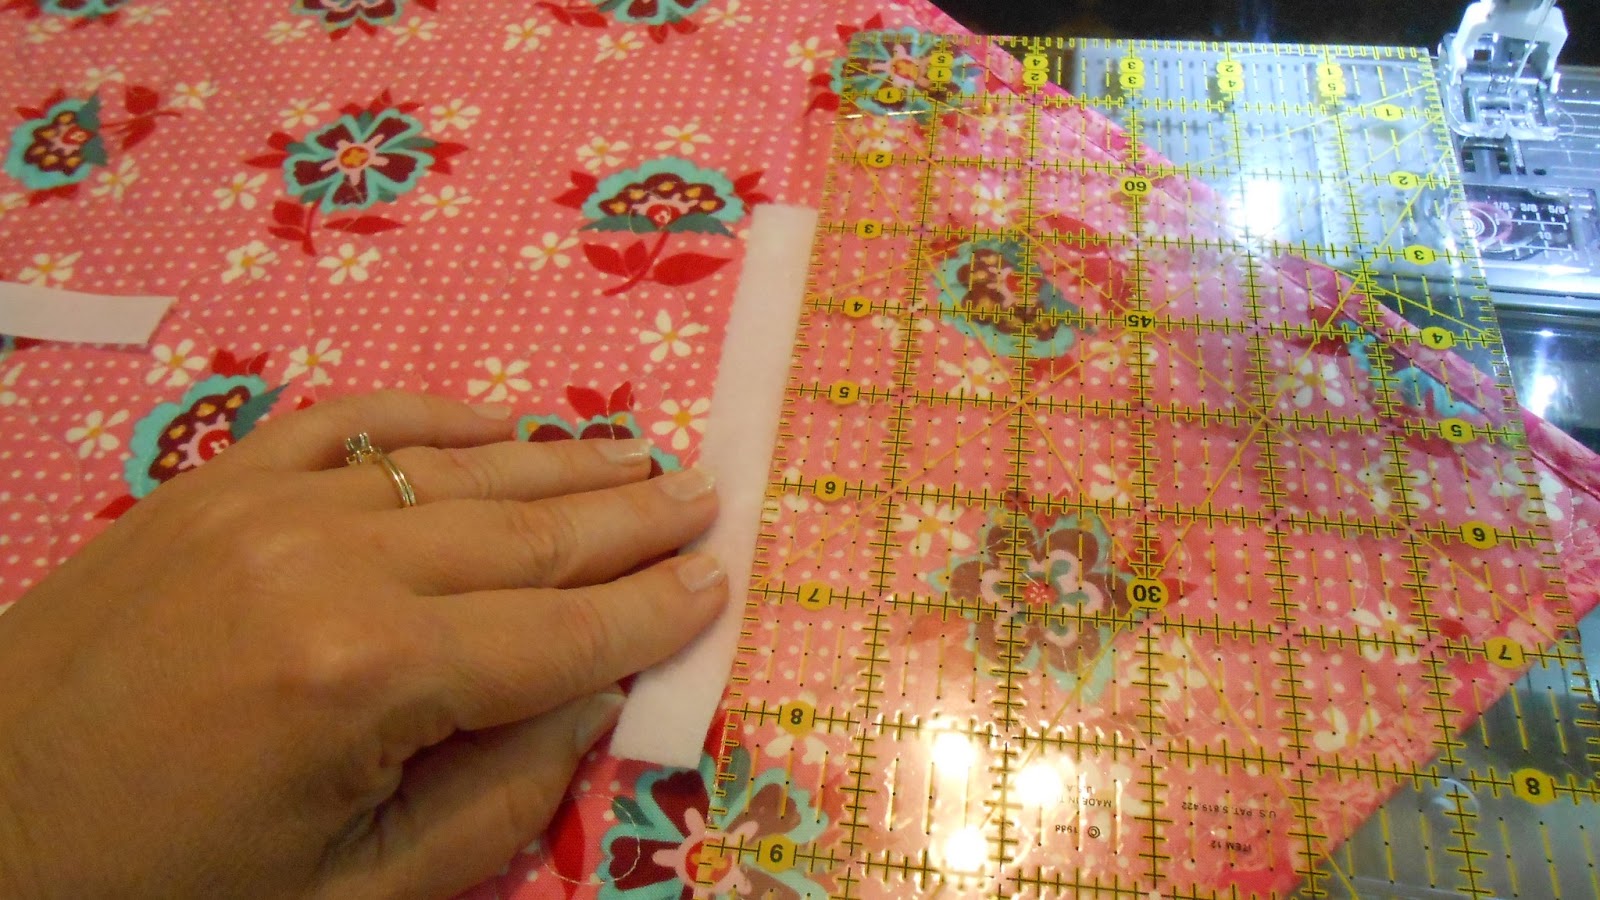
Open it flat, right side up. Using a narrow zig-zag stitch, sew on a 6 inch strip of Velcro, centered between two of the marks. Repeat on opposite side. If I am using wide Velcro I cut it lengthwise so it is not as thick, that makes it much easier to open!
Now when you fold it in the triangle...
Your two strips of Velcro match up!
Leaving your fabric in the folded triangle, sew a straight line from the top mark to the bottom mark on each side. (My mark is hard to see, but it is there!)
When you have sewn both sides, pull one corner over the middle of your pocket like this:
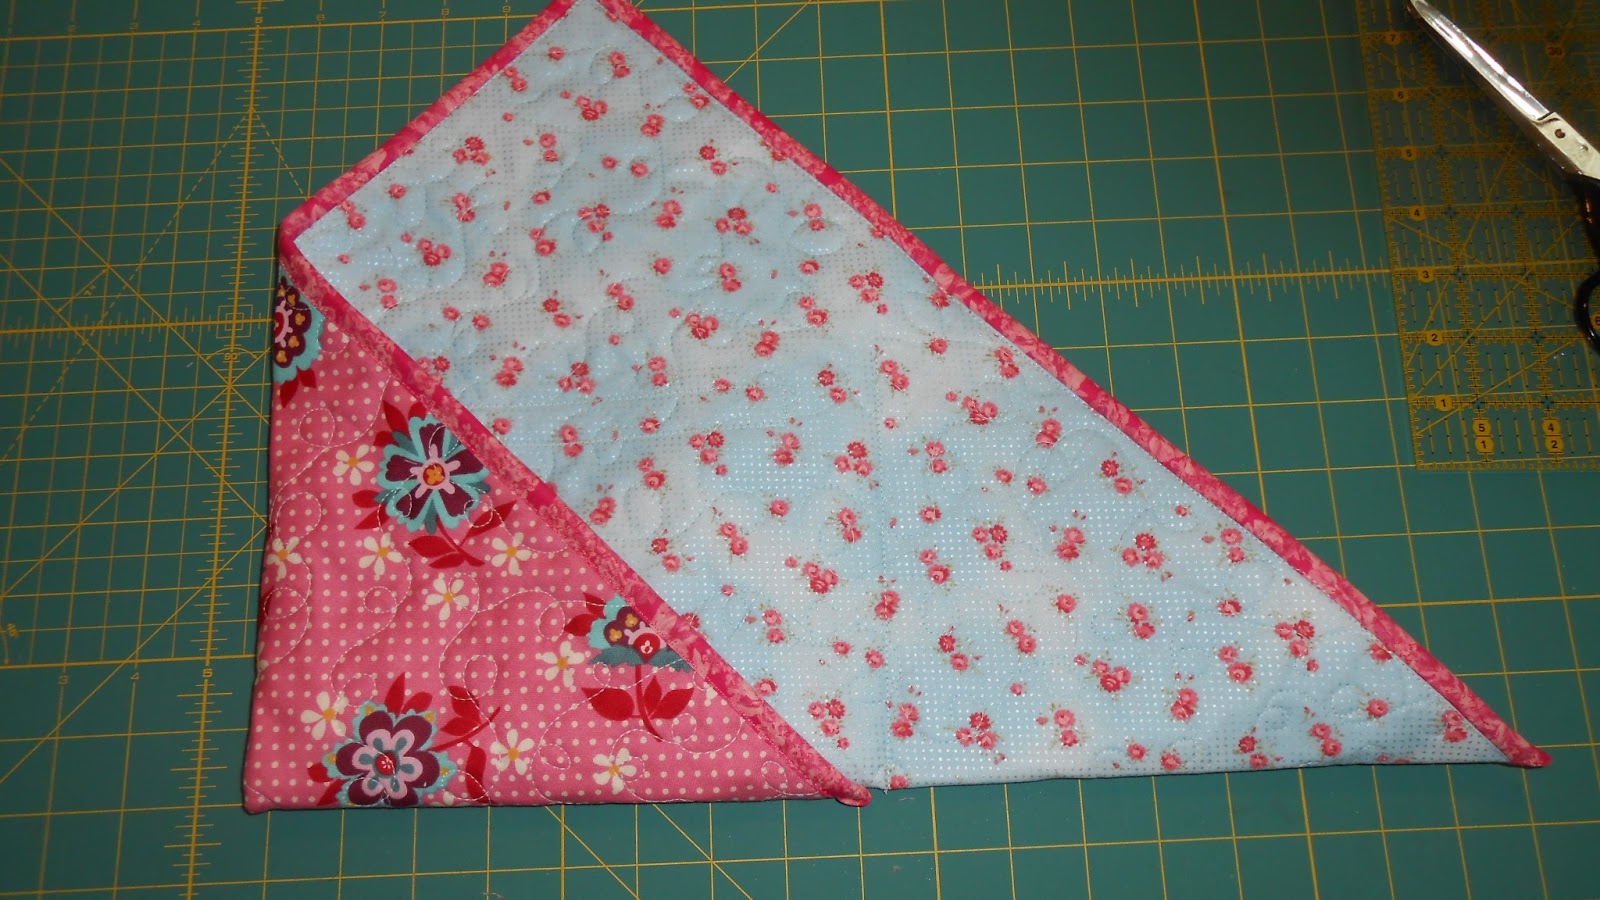
Fold the other corner back over the middle too. Using some kind of turning tool, poke out the corners so they are nice and sharp.
Fold down the top two corners so it looks like an envelope. Work with it until you have it looking like a nice rectangle - not all skiwampus (I love that word). When you like the way it looks, press it with a nice hot iron.

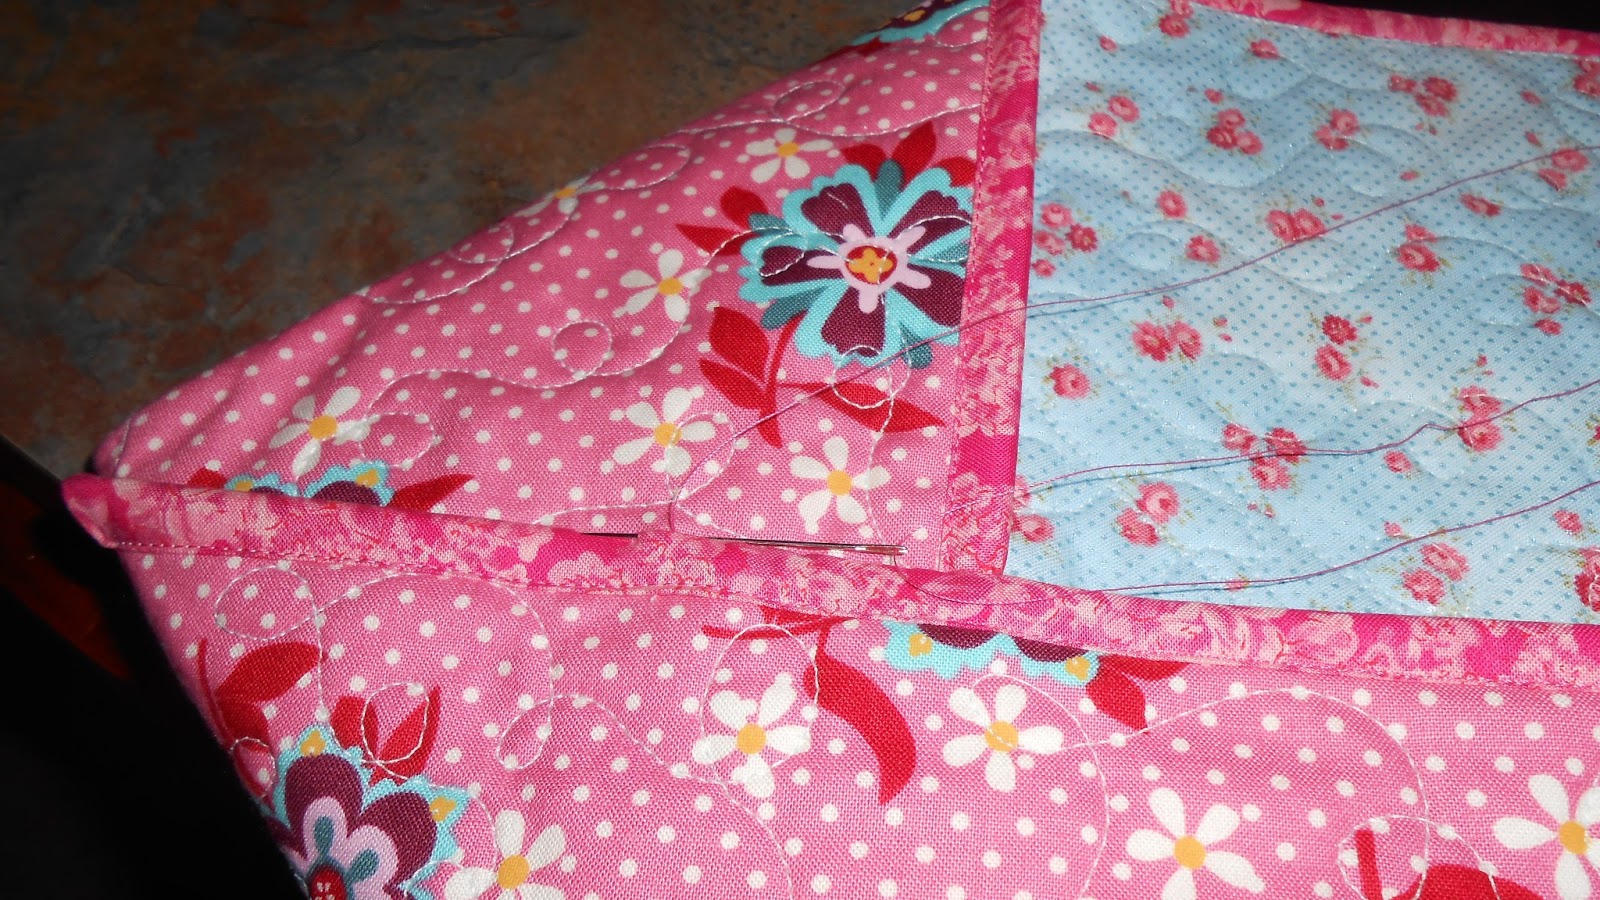
Pin it in place and starting at the point where the two pieces meet, hand sew all the way around so everything will stay in place.
You need a little embellishment, so get out your button box and audition some buttons! Sew a button on both points.

The last step is to hand sew on little squares of Velcro on both sides.
A cute makeup bag for my daughter!
 I had to make some more of those cute bags...so I thought, "Why not make a tutorial?". So here goes:
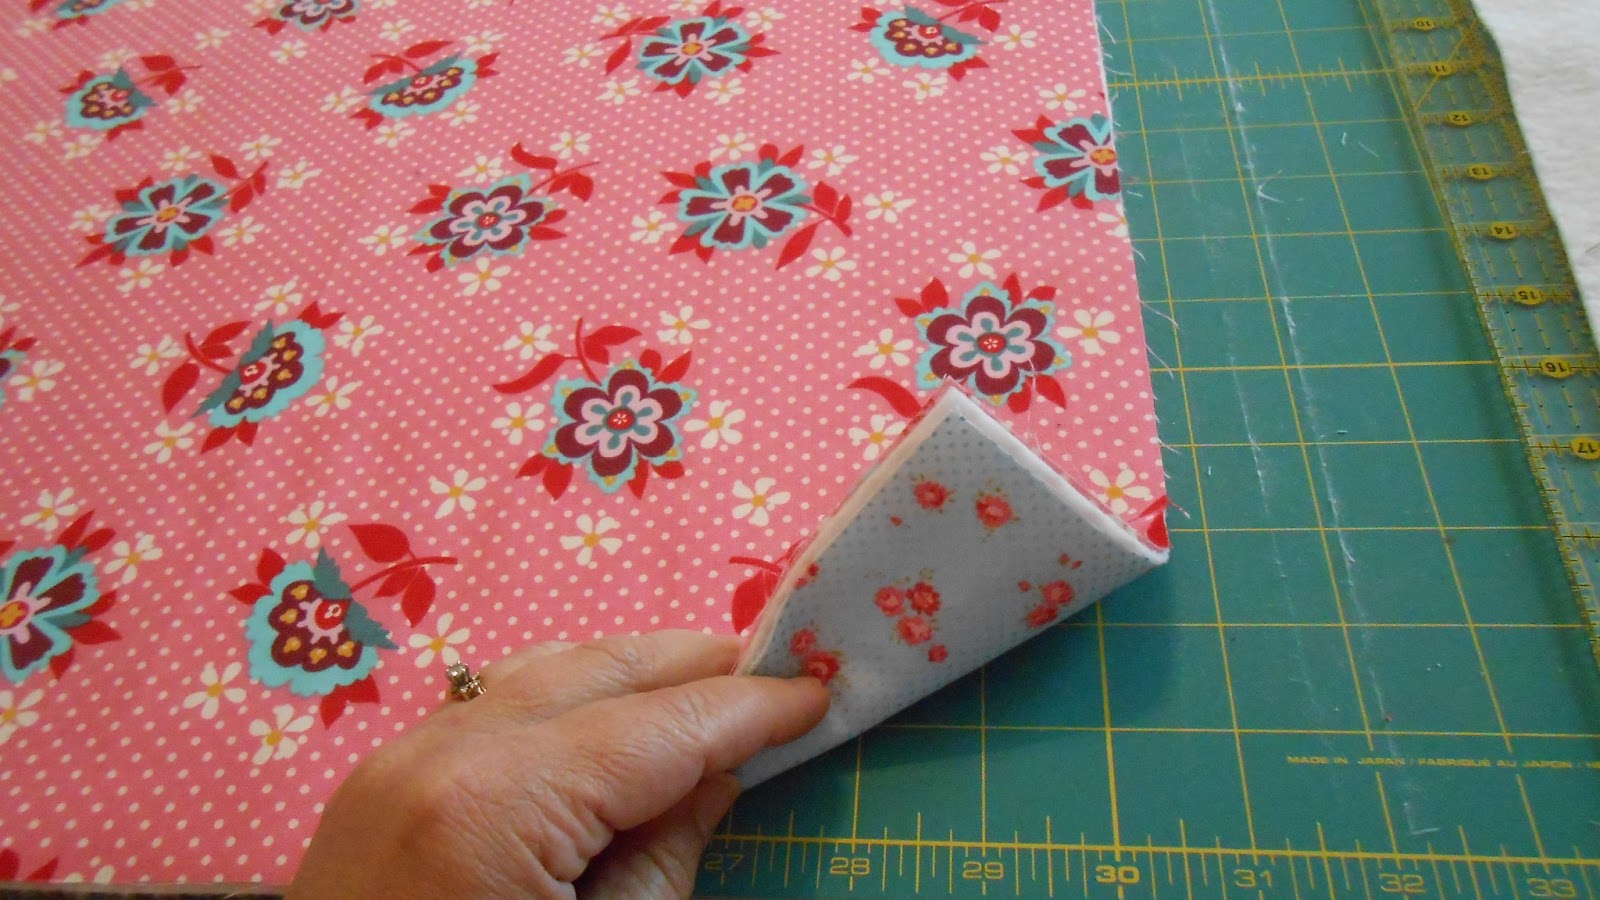


This is so cute! What a clever idea!
ReplyDeleteThat is so cute!!! Thanks for the tutorial!!!
ReplyDeleteGreat idea. Thanks for the tute.
ReplyDelete