Want to make a bag to carry your cutting mat? I cut a large mat in half, so this tote is for a mat that measures 24" X 18". If your mat is a different size adjust the measurements for your tote accordingly, and you may need a little more fabric.
This bag features a pocket inside that keeps your mat and large ruler snug up against the side of the bag. It has a flat bottom to give you width to carry plenty of supplies, and smaller inside pockets to carry a smaller ruler, your cutter and some scissors.
You will need:
1 yard of fabric for the outside
1 yard for lining
1 yard for large pocket
1 fat quarater for the smaller pocket
1 yd of fusible fleece
Step one: Cutting main pieces
Measure the widest side of your mat, and add 5 inches. My mat is 24 inches long, so I cut my fabric 29" X the width of fabric. Cut two of these, one of the fabric and one of lining.
Cut one piece of fleece 1/2" smaller each way, so with my measurements, I cut my fleece 28.5 by the width of the fleece.
Then I fused the fleece to my lining piece. Make sure you have all the wrinkles pressed out of your fabric before you apply the fleece. When I got to the edge that was too long, I just trimmed so it was a little less than my fabric
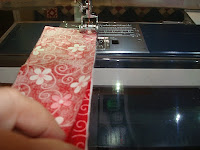
Your fabric should be slightly bigger than your fleece, and should look like this.
Step 2 : Make the pockets
For your large mat pocket, on the fold, cut a piece that is 29"(on fold) X 16", right sides together, sew around raw edges, leaving 4 or 5 inches open to turn it.
Cut a 15"X15" square from a fat quarter, fold it in half, right sides together, and sew around the raw edges, leaving 4 inches open along the long side to turn it.
Turn both pockets right side out, poke corners so they are square, press. Press along the opening as if it was sewn. *If your cutting mat is a different size, cut this piece 3 inches longer than the long side of your mat (cut on fold) by 2 inches shorter than the short side of your mat.
You are going to sew the pockets to the lining (the piece that has the fleece on it). Fold the lining piece in half and press a crease in the fold, you will need to use the crease line to orient your pockets. The crease will be the bottom of the tote.
Lay out your small pocket in a convenient place for you to reach in to your bag - mine is about 4 " down from the upper edge. Put the things you will carry in it, pin it down, make sure to pin the dividing lines between your items. This will make sure you have room for your stuff! Sew your pocket down around three sides, and stitch separation lines where you want to divide your pocket. Backstitch at end of stitching. Make sure the bottom (the side that had the opening) of your pocket is toward the crease in the lining.
Now it should look like this. Sorry the lining matches the pocket so well it is hard to see! Now place your large pocket on the other side of the lining, bottom of pocket toward crease in lining. Center it about 3" above the fold, and sew around the three sides.
Now is the time to sew the sides of your bag together. Fold the outer fabric, right sides together and sew the two shorter sides. Fold the lining fabric, right sides together and sew the same way EXCEPT leave an 8 inch opening in one side. You will need this later to turn your tote right side out!
 Step three: The Straps
Cut four strips of fabric 26"X 2 1/2" and two pieces of fleece 26"X 2 1/2". Depending on the amount of fabric you have left, you may want to cut two of the strap pieces from your outside fabric, and two from the lining.
Fuse the fleece to the wrong side of two of the strap pieces.
Now put each of these fleeced strap pieces with the remaining strap pieces, right sides together. Sew on each side of the straps, making two long tubes.
I turn them by putting a large safety pin through the fleece side,
Then I push the ends down in...
and push the pin through and then pull the strap right side out.
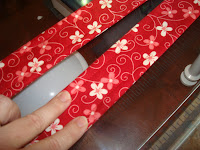
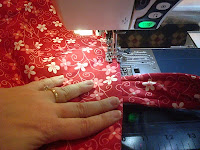
Press it flat, and top stitch along the long sides. When top stitching, lengthen your stitch and that will help it to appear straighter. I put mine at about 3, then remember to put it back when you are done - the longer stitch isn't as secure for regular sewing, but for top stitching it is great!
Now that your pockets are on, sew up the two sides of your lining and your bag piece, right sides together, but leave a 7" opening on one side of the lining piece for turning. Make sure you have pressed the fold at the bottom of both pieces, you will need this later for reference.
To place your straps, find the center of the top of the bag, place your straps 6 inches apart, 3" to each side of the center.
Pin, Sew across top edge. Make sure you haven't twisted your straps.
Step Four: Finish
Now it is time to make the bottom corners so your bag has a flat bottom. You will do this four times, twice on the bag and twice on the lining. Take your bag piece, remember that fold that has a nice crease in it along the bottom? OK, turn the bag over, you want to make a triangle at the corner. Pull out the fabric from each side of the crease and flatten it down so the crease lines up over the side seam. You can feel through from the crease to make sure you are lined up with the seam.
Now measure up 2" from the point, and draw a straight line across.
Sew on this line and then trim off corner.
One important thing I have learned is to sew with my iron - you thought it would be my sewing machine, didn't you? Pressing things between steps as you are sewing can make the difference between sloppy and precise. Press your seams open on the sides of your bag and your lining before we go on to the next step!
OK, now turn the lining piece right side out, poke out the corners, and slide it inside the bag piece, which is still wrong side out, now the right sides are together.
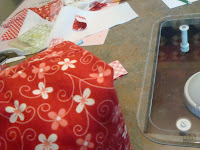
Mine is half pinned in this picture. Sew around the top edge, make sure the handles stay down inside where you can only see the ends, but make sure you reinforce where they are basted on as you go around the top.
Now reach inside the opening you left in the side of the lining and pull your bag right side out! Almost done!!
Press the top edge and top stitch all the way around with a longer stitch. Hand sew up the opening in the lining!
Poke all your corners so that they come out together and hand sew a few small stitches in the corners to keep your lining from pulling up. Ta Da! All done! Fill up your pockets and you're ready to go!


Very nice! Thank you!
ReplyDeleteThanks for sharing this. Will have to come back when (or if) I decide to make a tote.
ReplyDeletePS: Sorry, that sounded rather abrupt. I didn't mean to. I just don't often take my sewing stuff anywhere. What I need to do, tho, is make nice covers for my cardboard cutting boards. They're getting dirty.
ReplyDeleteThanks! Looks like a nice (and quick) project - putting on my weekend to-do list.
ReplyDeleteJenna,
ReplyDeleteThanks for the "Tutorial for cutting mat tote".
I just found your site yesterday and have finished the tote this morning.
My mat is a little bigger, but I was easily able to make adjustments.
Next week I will be attending a big quilt festival in Virginia and taking my mat for a class. So now it will be very easy to carry the mat and some supplies.
Thanks again,
Janet in Virginia
I recently made your bag - thank you for the nice tutorial. You can find my photo of it here: http://www.flickr.com/photos/kathygrom/6998895404/in/photostream
ReplyDeleteExcellent, what a webpage it is! This web site presents useful facts to
ReplyDeleteus, keep it up.
Also visit my web-site :: bmi chart female
I have been exploring for a little for any high-quality articles
ReplyDeleteor weblog posts on this kind of house . Exploring in Yahoo I at last stumbled upon this site.
Studying this info So i am satisfied to express that
I have an incredibly excellent uncanny feeling I came upon exactly what I needed.
I most undoubtedly will make certain to do not omit this website and provides it a look regularly.
Look at my web page - Glider Rocker
I am regular visitor, how are you everybody? This paragraph posted at this web
ReplyDeletesite is in fact fastidious.
my web site: 18 inch dishwasher
I visited several web pages except the audio quality for audio songs existing at this web site is truly fabulous.
ReplyDeletemy site; specialty seat covers
This comment has been removed by a blog administrator.
ReplyDeleteYay!! Tysvm for this tutorial!! Just what I need as Im going away for a few days & I am taking my sewing machine & supplies. Awesome tute!!
ReplyDeleteThank you! I would love to see it when you are done!
DeleteThank you for this wonderful tutorial! I just purchased my new mat yesterday, and am looking for a bag to store it in so it keeps clean, and this will be perfect for both storage and taking my mat with me! I might try to add a zipper to the top of the bag too! Thank you very much!
ReplyDeleteThank you for sharing this pattern. I'm new to quilting and am trying to figure out how to carry my cutting board to class. This looks like the perfect solution.
ReplyDelete