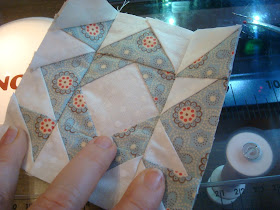
One technique that will speed up the piecing process if you are making a lot of blocks out of the same pattern is to do the same part of the block over and over and get all of the pieces up to the same level before you go on to the next step. I line everything up with the pieces all ready and go from one block to the next, sewing the same pieces together.
Press all the pieces to make sure that when you start your next step you won't have any tucks .As you press make sure you have your 1/4" seam allowance overlap so you will be ready to sew on the next piece. Even the outside edges of your block must have the 1/4" allowance so you will be able to sew your blocks together.
The blocks I am making have three parts that are pieced separately and then sewn together. After you have finished sewing the separate pieces for your block, and pressed them, it is time to trim them. Put your finished block piece fabric-side down on your cutting table and trim the edges. When you line up your ruler, line it up with the STITCHING line, give your self a 1/4" margin and trim whatever sticks out. I do this instead of lining up my ruler with the outside line of the block, because sometimes I discover that the line has become distorted from copying, and I want to make sure I have the correct seam allowance.
Now sit down at your machine, hold the pieces next to each other to get your directions right and sew the block pieces together.
If you don't get your bearings on where you are in the block, you may sew the wrong edges together and end up with something like this... Ooops!
I hate when that happens!!
OK, now line up your pieces (correctly!) and sew a careful 1/4" seam.
If you have trimmed and sewn accurately (that is easy, since you are sewing on lines!) when you turn it over you will see that your stitching line is right over the line on the bottom side.
When all of the parts of your blocks are sewn together, I take off the paper. Some people prefer to leave the paper on until they have sewn the whole quilt top together, but the more seams your put through this, the harder it is to get the paper out! I use a seam ripper turned upside-down. I run the point across the line of stitching and it breaks up the paper, and then you can just tear the paper along the stitching lines and it comes off pretty easily.
Ta Da! Now your blocks are all complete and you can finish your quilt top!


No comments:
Post a Comment
Thank you so much for taking the time to comment!